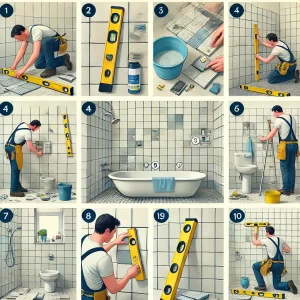
How to Tile a Bathroom
Step 1 – Plan the Layout
Measure the walls and floor to determine the layout of your tiles. Planning ahead will help minimize cuts and ensure a balanced design. Mark the center points of each wall for reference.
Step 2 – Gather Tools and Materials
Ensure you have all necessary tools: tile cutter, trowel, grout, spacers, level, bucket, sponge, and adhesive. Prepare safety gear, including gloves and safety goggles.
Step 3 – Prepare the Surface
Clean the surface thoroughly to remove any dirt or debris. Ensure it’s level and smooth for a strong tile bond. If needed, apply a primer to improve adhesion.
Step 4 – Mix the Tile Adhesive
Prepare the adhesive according to the manufacturer’s instructions. Mix only as much as you can use in 30 minutes to prevent drying out.
Step 5 – Apply Adhesive and Begin Tiling
Using a notched trowel, spread the adhesive on a small section of the wall. Press the first tile firmly into place, following your layout plan. Use spacers to maintain even gaps between tiles.
Step 6 – Cut Tiles to Fit
For edges and corners, measure and mark tiles before cutting them to size with a tile cutter. Make sure each tile fits snugly in its designated space.
Step 7 – Let the Adhesive Set
Allow the adhesive to dry fully, which may take 24 hours, before moving on to grouting. Check the manufacturer’s instructions for the exact setting time.
Step 8 – Apply Grout
Remove the tile spacers and apply grout over the tiles with a grout float, pressing it into the gaps. Wipe off any excess grout with a damp sponge.
Step 9 – Clean the Tiles
Once the grout has started to set, use a clean, damp sponge to remove any haze from the tile surface. Buff with a dry cloth after the grout is completely dry.
Step 10 – Seal the Grout (Optional)
If desired, apply a grout sealer after the grout has cured to protect against moisture and stains, particularly in areas exposed to water.
Make an enquiry below:
