How to Fix Roof Tiles
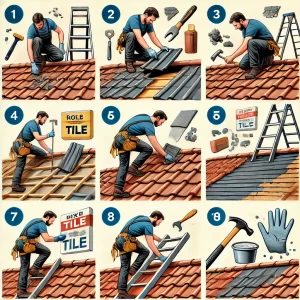
 Step 1 – Assess the Roof Tile Damage
Inspect your roof carefully for any broken, cracked, or displaced tiles. Look for signs of water damage, mould, or areas that seem misaligned.
Step 2 – Gather Required Tools and Materials
Prepare essential tools such as a ladder, safety gloves, replacement tiles, a hammer, chisel, pry bar, and roofing adhesive. Having everything within reach will save time during the repair.
Step 3 – Ensure Safety First
Place your ladder securely and, if possible, use a harness for added safety. Wearing non-slip shoes and gloves is essential to prevent accidents.
Step 4 – Remove the Damaged Tile
Use a pry bar to lift the tile carefully. For tiles with adhesive, gently tap a chisel underneath to loosen it. Remove any broken pieces without causing damage to adjacent tiles.
Step 5 – Prepare the Space for the New Tile
Clear any debris left by the damaged tile. Ensure the underlying area is clean and level to allow the new tile to sit securely.
Step 6 – Place the New Tile
Slide the replacement tile into place, aligning it with the surrounding tiles. Secure it with adhesive or fasteners, depending on your roof’s design and materials.
Step 7 – Seal and Check for Stability
Apply roofing adhesive under the edges of the new tile if needed, then press down firmly to ensure a secure fit. Double-check for any loose areas to ensure stability.
Step 8 – Inspect and Clean Up
Once the tile is in place, inspect the entire area to ensure the repair is stable. Remove any remaining debris and clean up your tools.
Make an enquiry below: